Dear all, the December 7th newsletter about soil preparation contains an incorrect link. The article about soil preparation can be found
here.
Pre-sowing for the vegetable garden - The start of your vegetable garden plants ... wonderfully relaxing
You can also choose to buy
vegetable garden plants . That's easy, and you usually get good quality, especially here in
our online store . If the plants aren't top quality, we won't offer them. But sowing your own seeds is, of course, quite magical. Regularly checking on your seedlings, seeing how they're growing, what their needs are... wonderful.
Introduction to pre-sowing
What's the difference between sowing and pre-sowing? Pre-sowing is just like sowing, but with "for" in front, right? Funny, Tom. No, seriously... when circumstances prevent you from sowing directly into the ground where you'll eventually harvest, we call it pre-sowing. With pre-sowing, you also have to prick out and transplant at a later date; we'll cover these terms later.
Example: In this video I sow my
peppers and
bell peppers for December 20, 2017:
https://youtu.be/N6coT8mDQ94
Why pre-sow?
Due to bad weather conditions
- You have soil that is too wet or frozen to work. For example: If you have heavy clay soil that is a single block of clay in spring, or if there's a layer of water or ice on it, and your vegetable garden is a (skating) pond, then it's best to pre-seed.
- It's still too cold outside; your seeds would germinate far too late if we let nature take its course. So you want to save time by sowing under glass, indoors on a windowsill, or in a propagator . For example: peppers would never ripen if they had to wait until April/May for germination outdoors in the open ground (if the pepper seeds hadn't already rotted).

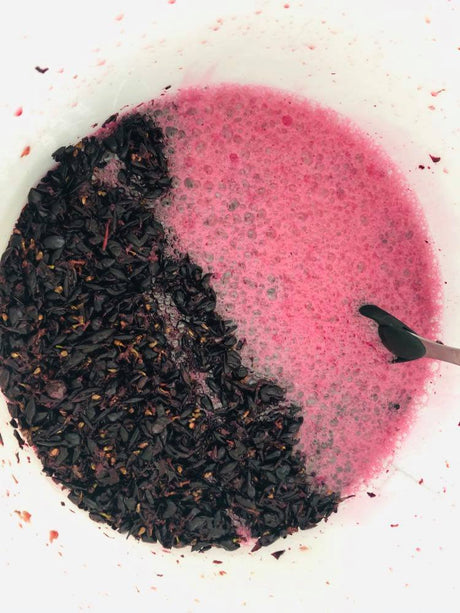
My homemade sowing and cutting soil (recipe later in this article)
- Your seeds are too small to sow in the open ground and would be washed away by the wind and weather. For example: Small flower seeds (lobelia), small herb seeds (thyme), or small vegetable seeds (cabbage) are better sown early.
- Your celeriac seeds germinate very slowly. Slower than nearby weed seeds. Your young plants would face too much competition from weeds, so we pre-sow them.
Too much nutrition in the soil to sow directly
- The soil is too rich in nutrients to grow seedlings. All the energy a seedling needs to grow into a small plant with its first few true leaves is contained in the seed itself. If you sow in soil that is too nutrient-rich, your seeds can burn due to the excess nutrients. You can avoid these conditions by adding seed starter mix to your seed hole or furrow, which will help your seeds germinate more easily. For example: I sow my carrots in 5 cm deep furrows filled with seed starter mix that contains very little nutrients.
Pre-sowing makes good vegetable garden management easier
- Location: Sowing seeds on your windowsill or in a propagator is best done compactly. Sowing a Tiny Tim tomato plant directly on your patio in a 5-liter pot ? Then your windowsill, the space under your grow lights , or your propagator will be filled right away. Sowing seeds in smaller pots , trays , or seed trays saves space.
- Watering: You can also water more easily when your plants are in a smaller space. I place all my trays , pots, and seed trays in black propagators , and I can water them very easily. This way, the plants absorb the water from below. This stimulates root growth much better than watering directly above the ground.

Watering in a base or growing container
- You also save valuable seed or potting soil . A small plant doesn't need the nutrients of a mature plant in the ground. With one coir block, I can make 70 liters of seed and cutting soil, which fills about 10 seed and cutting trays , each with 700 cells, with seedlings. With that same 70 liters, I can only fill 40 to 50 well-packed P9 pots . So, pre-sowing saves space and soil.
- Backup plants if things go wrong: Not every seed germinates. Even if you have top-quality vegetable garden seeds from Moestuinweetjes, sometimes you'll have a seed that doesn't germinate. If you've pre-sown several plants of a particular variety, you still have backup plants. If you have any leftover plants, you can still share or exchange them. Try not to be tempted to plant all your backup plants in the same designated space. You'll then have to use closer planting distances, and you'll often get a lower yield per square meter than if you used the correct planting distances.
- Choice: If you sow early, you retain the choice of which plants to grow in which location. Granted, in the open ground you can still thin out, but you can no longer say, "I want winter purslane in this spot," when you've already sown arugula seeds there.

Pre-sown plants in a
tray take up less space
Where to pre-sow?
Can you sow seeds in different
trays ,
seed trays, or pots? In this chapter, you can read about what I use and my ideas behind it. Everyone has their own preferences, of course.
A sowing and cutting tray
This is also called a propagation tray. A propagation tray has cells in which you can efficiently sow young plants. The plants generally remain in the seed and cutting
tray or propagation tray until the second pair of true leaves or a little longer. The cells separate each plant and prevent the young roots from tangling. I don't like to unravel the roots of slow-growing plants like
peppers ,
bell peppers , and
eggplant because that stunts their growth. I'm also not very good at unraveling roots when planting out/prickling them out, so I'm a fan of
trays .
There are soft and hard
trays . The soft ones break more quickly and are cheaper, but you can squeeze the bottom of the cell to release the plug more easily. The hard
trays are permanent and can be reused indefinitely. They are a bit more expensive, and you have to scoop out the plugs or use a large-headed nail to push the block upwards at the bottom of the cell. In this case, the block shouldn't be too moist. I don't water my
trays in the last few days before planting or prickling out because it's easier to
remove the plugs. However, don't plant out bone-dry plugs; that's not good either.
Watering in trays
When I sow, I ensure my seed and cutting soil is well-moistened (see 'How to pre-sow' for more information). I also regularly moisten the top layer of the seed
trays with a
plant sprayer . This means I don't need to water much before germination. Once germinated, I know roots are on their way to the bottom of the
trays . To encourage this, I water in a base or
black propagator where I place the seed
tray . I never add more than 5 mm of water to the
tray . Later, when there are 24 P9
pots in the
black propagator, for example, with
tomato plants, I often add much more.
Which crops do I grow in trays ?
- Fruit crops: peppers , paprika 's, aubergines ( trays with holes of 4 to 4.5 cm)
- Leafy vegetables: lettuce , winter purslane , rocket, mustard lettuce, lettuce , spinach , ... ( trays with holes of 3.5 to 4 cm)
- Cabbage varieties (except radish and kohlrabi, which I sow directly): cauliflower , kale , broccoli , red cabbage , white cabbage, Savoy cabbage and Brussels sprouts.
-
Potatoes : Huh? Potatoes ? Yes, but not in soil. The trays are ideal for sprouting your potatoes ; you can use them to stand your seed potatoes upright. Egg cartons also work, but they're more likely to fall over.
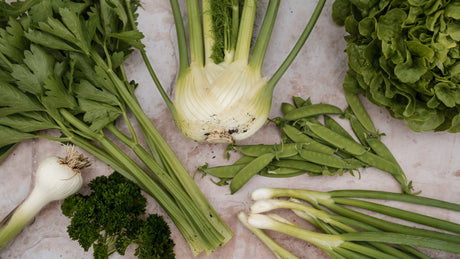
- Root vegetables: Beetroot and fennel .
Should you plant the trays directly or prick them out later?
I prick out most of the crops I sow in
trays into a P7, P9, or P11 pot. This is especially true in spring, when the plants aren't ready to go outside yet and are starting to need nutrients. If you don't like prickling out, start sowing a little later in the year. You can often transplant them straight into the
greenhouse or garden shed. If not, it's better to prick out. It feels like taking off tight shoes, and it also gives the plants a sense of security and encourages them to keep growing.
Sow directly in pots
Sometimes I sow directly into
pots , usually P7, P9, or P11 pots. The number in the pot name indicates the length and width of the pots in centimeters. The depth varies but is usually slightly deeper than the length and width as seen from above.

P9 pot
Why sow directly in pots?
I do this with crops that don't like being pricked out or with large
seeds for which
trays are too small. I also do this with crops that have deep roots. And finally, I also do this with crops that I normally sow or plant outdoors early, but that's not possible due to weather (frost or an excess of water).
You might be saying, "Tom, then your plants won't have enough nutrients in the seed and cutting mix as they grow." You're right. In the chapter above, "Why pre-sow, point 3," I said that seeds shouldn't be sown in nutrient-rich vegetable garden or
potting soil , but rather in poorer seed and cutting mix with a better structure. To be able to pre-sow in pots with seed and cutting mix without the young plant starving after the first two true leaves, I have a trick. I fill my pot three-quarters full with vegetable garden
potting soil that does contain enough nutrients. I fill the top layer of the pot with one-quarter seed and cutting mix. I sow the seed in that top layer of seed and cutting mix, and when it starts growing and needs nutrients, it encounters the bottom layer
of potting soil that does contain nutrients.
Which crops do I sow straight away in pots ?
-
leek : I sow my very early and summer leeks in a P9 pot in a top layer of sowing and cutting soil
-
seed potatoes onions, shallots and/or garlic when the ground is still frozen in February/March and my seed potatoes are in danger of germinating.
- Legumes: peas , snow peas and broad beans when it remains too cold or too damp for too long (especially in wet clay soil it is not possible to sow so early).
Water pots quickly and efficiently
In this film clip you see the growing
containers I use to water the plants:
https://youtu.be/BfNMD9urzx8?t=92
For germination, I keep the top layer moist with a
plant sprayer , just like with the
trays . After germination, I stop watering from above. The pots labeled "P" have holes in the bottom. This makes it easy to water from below. Place your pots in a
black propagator and pour 5 to 10 mm of water into the tray. The water will be absorbed by the
potting soil and reach the plant's roots.
If growing a particular vegetable requires plants to remain in
potting soil for longer than 4 to 6 weeks (
leeks, for example), it's helpful to add a universal liquid fertilizer to the water. The
potting soil contains sufficient nutrients for the first 4 to 6 weeks, and then I apply universal liquid fertilizer every two weeks.
You can also use
seed trays for pre-sowing. These are simple rectangular containers with holes in the bottom. Crafty gardeners make their own from recycled materials.
seed tray for broadcast sowing
You can broadcast sow seeds in a
seed tray . This means you scatter the seeds randomly at a certain distance. Personally, I don't do this very often. I do it occasionally for
lettuce when I need to move quickly. Just take a shovel of seed and cutting mix, moisten it well, put some
lettuce seeds on top, cover with some more
perlite or
vermiculite , water with a
plant sprayer , and in 5 minutes you've sown hundreds of lettuce heads. It's a bit more work pricking them out because the roots of the young plants get more entangled if you don't prick them out in time, but many people do it this way.

seed
trays with holes in the bottom
seed trays for orderly sowing
I've often seen it in photos from other vegetable gardeners: a
seed tray with cabbage or
beetroot plants, strewn in neat lines with
perlite granules or coarse sand. I prefer pre-sowing
trays because they make planting out or prickling out easier. More information about strewing and much more in the next chapter.
How to sow seeds step by step
Fill your trays with sowing and cutting soil:
- Use a good seed and cutting soil. This soil is like your plants' infancy and is crucial for their first steps and growth. You can buy seed and cutting soil in ready-made bags. I make mine myself using coconut coir , a very airy soil without any bumps or lumps. It's a residual product from the food industry, so it's a good idea to reuse it.
- In a black seed tray or bucket, mix 2/4 volume coconut coir with 1/4 volume perlite granules and 1/4 volume sifted potting soil for vegetable gardens. The coconut coir provides excellent rooting structure for your plants, while the perlite granules retain water and create aerated soil. The potting soil provides a small amount of nutrients.
- For strong seedlings I also add one gram (the tip of a teaspoon) of magnesium sulphate per litre of soil.
- Mix everything well.
- Using a watering can and/or plant sprayer, add water until the mixture is thoroughly moistened. You'll know your soil is ready when you squeeze the well-mixed soil and a little moisture runs between your fingers.
- Fill your seed and cutting tray , pots , or seed trays with the mixture and firmly press the seed compost with your hands or the bottom of another tray , pot, or seed tray . Your tray , pot, or seed tray should now be filled to within 5 to 10 mm of the rim.
Here's what I'm sowing my tomatoes for in March 2018:
https://youtu.be/x2U8eNpK2q4?t=165
- Place one seed in each cell on top of the seed-starting mix. You can also plant multiple seeds and, after germination, cut away the weakest seedling with scissors. For some crops, I sow multiple seeds in one cell without thinning, namely: Spring onion that I want to plant in clumps, and all types of cut-leaf vegetables (arugula, mustard lettuce, purslane, etc.).
- Sow enough cells so that if something goes wrong with a particular species, you have a backup of seedlings.
- You can apply a very thin layer of sowing and cutting soil on your seeds or sprinkle them immediately (see next step).
- Cover your seeds with a layer of your sowing and cutting compost (the amount depends on the sowing depth of your crop) and moisten well with a plant sprayer or the gentlest, finest setting.
- Now cover your pots , seed trays, or seed trays with a thin layer of perlite , vermiculite , or coarse sand. Mist your tray again thoroughly with the finest mist from a plant sprayer .
Growing your seedlings into young plants:
What do you do before your seeds germinate?
- Now place your seed tray in a humid place at a constant temperature of 20 to 28°C. I germinate my peppers and eggplant at 28°C, my bell peppers and tomatoes at 24°C, and the rest at 20-22°C. Check the germination temperature in the growing information for the correct temperature.
- If you have a propagator , set it to the correct temperature and close all ventilation flaps until you see the first seeds germinate. The grow lights should not be turned on yet, unless you are sowing light germinators, which can receive 15 hours of light per day.
- Here is a list of light germinators: savory , basil, chamomile, parsley, marjoram , marjoram, poppy, stevia, lettuce, endive, celery, celeriac, celery , strawberry, tobacco, kiwi and carrot
- If you don't have a propagator , place your tomato plants in a warm place to germinate. A grow box with a lid also maintains high humidity for germination. You can also use cellophane stretched over your seed tray , container, or pot. For your light germinators, you can also purchase one or more growth lamps for optimal germination. The Sunbl Aster T5HO lamps sold here on the website are the best value for money. Regular cold-light fluorescent lamps from DIY stores are cheaper and also work, but they can't match the T5HO lamps, which have a higher light intensity (lumens) and shorter wavelengths that allow the plants to develop very well.
- The cost of a grow light: Under a grow light Grow light Sunblaster T5HO 60 cm 24 watt 6400 Kelvin you can create a sowing surface of 60 x 30 cm. The 24 watts consume at an energy rate of 0.30 euros per kW and a burning time of 15 hours per day: 24 (lamp wattage) x 15 (burning time per day) = 360 W = 0.360 kW. Do the 0.360 kW x 0.30 (rate per kW) and you arrive at 0.108 euros per day or +/- 3.24 euros per month.
[caption id="attachment_20645" align="alignnone" width="640"]

Propagator Vitopod and Geopod[/caption]
Your seeds are sprouting! Take action!
- What should you do now?
- If you are growing with a propagator and grow lights : open the ventilation flaps fully, turn on your lights for 15 hours a day and adjust the temperature on the thermostat to 20-22°C
- Do you have separate growth lights ? Place your tray (dark germinators) now also under growth lights at a temperature of 20 degrees.
- Growing without a propagator : place your seed tray , container, or pot in a cooler spot; 15°C is ideal. A south-facing bedroom windowsill is ideal. You can also remove the cover or cellophane from your seed tray. If your plants are kept warm without sufficient light, they will stretch towards the light and become elongated and weak. Heat and light should go hand in hand.
- Keep in mind that your seedbed will dry out faster now, so keep an eye on the soil moisture. Ideally, water in a black seed tray or stand where your tray rests. This allows your seedlings to absorb moisture from below. This is ideal for root development.
- You don't need to fertilize your mini plants yet; all the nutrients your seedling needs now come from the seed and the light. If your seedlings don't get enough light, they'll start reaching for the light; a grow light is ideal for this.
And now we wait until we can plant out or prick out the young plants. Two terms that will be explained in more detail in future articles and newsletters.
In this video you can see how I transplanted my lettuce plants that I broadcast-sown in the spring of 2018:
https://youtu.be/dKaQHSjeUVM?t=113
If you found this information useful or valuable, please let me know at
tom@moestuinweetjes.com . If you have any additions or tips I can incorporate into this information, feel free to email me. You can also leave your comments below this post.
By purchasing your
vegetable garden seeds , tools, fertilizers, crop protection products, or other gardening supplies in
our online store , you support the website, the YouTube channel
Moestuin TV , and the Moestuinweetjes planning app (currently under development, expected in December before the new season starts).
Together we try to change the world, square meter by square meter
Have a pleasant autumn/winter and good planning for your 2019 vegetable garden.
Greetings, Tom
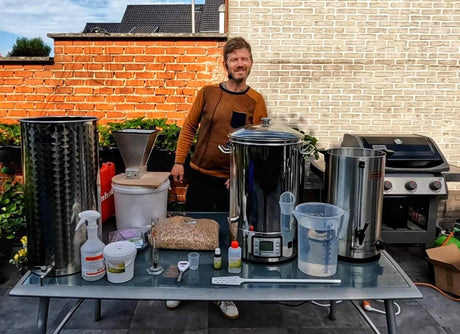
Myself in my vegetable garden