Free shipping in the Netherlands & Belgium from €75*

We send small plants from Mon to Wed so that they do not hang around in the mail during the weekend. Read more in our FAQ.

Preserving Vegetables - The Complete Guide - Preserve More From Your Vegetable Garden

groenten inmaken

Do you also want to preserve your fantastic, home-grown vegetables but you don't know exactly where to start? That's good, I've delved into it and would like to share the fundamentals I learned. This overview of preserving and preserving vegetables will certainly help you on your way. Later on, other fantastic preservation techniques will also be discussed, such as fermenting, drying , pickling, making tea, ...

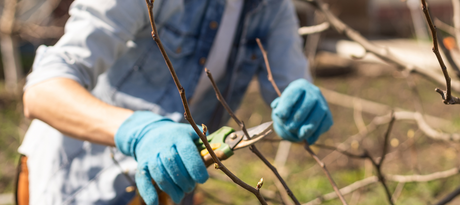
You probably know the feeling. You harvest one wheelbarrow of vegetables after another from your vegetable garden between July and October. Beads of sweat stand on your forehead and your smile bridges the distance between your ears. But what then? Eating of course and especially sharing. Making friends and acquaintances happy, you are welcome everywhere with fresh organically grown vegetables. What else would you do with it? The space in your refrigerator, freezer and storage space is limited. Fresh products only stay fresh for a few days.

Fresh as a whistle, you won't believe your taste... on February 18

But what if you found a way to preserve your vegetables without losing their flavor and without having to store them in the fridge or freezer? Those same vegetables that give you so much satisfaction, you can easily keep them for a whole year and longer in a very simple way. And when you can conjure up your home-grown beetroot and carrots or tomatoes super fresh on the table in December ... then that same smile from that moment with your wheelbarrow a few months before will definitely come back.

Why preserve vegetables?

There are many reasons to preserve your vegetables, I mentioned earlier the taste that is better preserved. The reason is among other things because you pick your vegetables ripe. Vegetables for the supermarket are rarely picked perfectly ripe because they often have to be saleable for a few more weeks.

The fact that you can preserve your hard-earned vegetables outside the fridge or freezer is also a big advantage in terms of space and energy consumption. The longer you eat from your own garden, the cheaper and more environmentally friendly it is. Food waste is also minimized if you have an easy way to preserve your vegetables. An advantage of preserving vegetables compared to other preservation methods such as freezing is that preserved vegetables keep much longer.

Snowball onions, hot tomato peppers, cherry tomatoes and radishes in 50% water 50% vinegar

A little history of canning vegetables

People have been preserving food for ages. The first techniques were drying, smoking, fermenting and packing in fat. Later, vinegar brines, jam and pickling in alcohol were added. However, none of these approaches resulted in reliably preserved food. There was always a certain risk of spoilage.

In the late 1700s, Napoleon Bonaparte was looking for a way to reliably preserve food for his troops, and offered a cash prize to anyone who could come up with a super method. After much experimentation, a French chef named Nicolas Appert discovered the packaging, heating, and sealing technique we use today, known as canning.

Home canning has been growing in popularity since the late 1850s, when John L. Mason invented the first reusable screw-top jar. Canning techniques gradually improved, and in 1915 Alexander H. Kerr developed the two-piece canning lid that we still use today.

Preserving vegetables is not the same as canning vegetables

The terms preserving and canning are often confused. They are two methods of preserving food for a longer period of time. When preserving, you add a preservative. For example, sugar (jam or preserves), vinegar (pickles, or in combination with sugar, sweet/sour), alcohol (liqueur) or oil (pesto).

Preserving is immersing for a certain time in a (preserving) pan or preserving kettle in jars intended for that purpose. These can be special preserving jars , where you close a preserving jar with a rubber and a lid (and during preserving with clamps ) or suitable jars with screw caps .

What happens during the canning process of vegetables?

The technique behind canning is fairly simple. You fill a clean jar with food. You put the lid on the jar and immerse the filled jar in hot water for a prescribed amount of time (the amount of time varies greatly depending on what you are canning). When you remove the hot jar from the water, the heat begins to escape, taking with it any air that is still in the jar. The escaping oxygen pulls the lid down, creating an airtight seal. A food-safe sealant in the lid helps maintain the seal. High-acid foods preserved this way will last for at least a year.

Over the past 60 years, as food production has become highly industrialized and the grocery store and supermarket have become the norm, canning has declined dramatically in popularity. It has gone from being a seasonal necessity (how else would you preserve the fruits of your garden and fruit trees?) to a neglected art, still practiced in rural areas but all but abandoned by urban dwellers.

Thanks to the weak economy, concerns about industrial food safety, and the desire of many of us to have more control over what goes into our food, home canning has become popular again. But for those who didn’t grow up with their mothers or grandmothers, the process can be intimidating. Take heart! It’s not nearly as hard as you think.

It is not recommended to give canned food to children under 1 year of age. See: BOTULISM IN CANNING

Preserved garlic with finely chopped chili. Delicious in soup and all your sauces

The acidity of preserving: The more acidic, the better your food is protected

I choose to can everything, but according to many sources you can can sterile mixtures (usually cooked) that have a pH of less than 4.6 pH without canning. For example, a tomato sauce with a pH of less than 4.6 you can simply cover with a lid and your sauce should be and remain sterile. But then you must not have made any mistakes in cleaning or sterilizing your equipment.

But also for tomato sauce it is strongly discouraged to store it without preserving it. Due to the acidity of the tomatoes it does have a better chance of success than other vegetables, but preserving it certainly keeps it fresh and edible for much longer. Moreover, not everyone is able to test the acidity.

There is nothing more annoying than having to throw away one jar after another, which is why we did not grow, harvest and preserve our vegetables with heart and soul. Personally, I always choose to preserve or can my jars . You can do one series of jars after the other. In one afternoon you can process masses of food for the winter. I usually do it outside, which is wonderful.

What do you need to preserve vegetables?

To get started, you really don't need much besides your regular kitchen utensils for your preparation (ladle, kitchen scale, towels, colander, paring knife, etc.)

Preserving vegetables step by step

Step 1: Find a good recipe to preserve your favorite vegetables

There are many recipes to pickle vegetables, but you can also be creative yourself. You can pickle in vinegar, in water or you can make a sauce or soup at once. With the last three you of course also preserve the neutral taste of your vegetable garden vegetables. Vinegar has the advantage that you can make a delicious pickle with which you can boost a dish with a sour taste in one second. Also combine as much as possible. In October I made a tomato-garlic-onion- eggplant -zucchini- paprika - pepper -sauce. The tears come to your eyes when you pour your preserving jar generously over a homemade paste. But a pickle with radish, gherkin, onion, garlic, cloves and rosemary is also a party in the mouth, especially at a time when not much is growing in the vegetable garden.

I clean my jars, rubber bands and lids in my dishwasher on the hottest program.

Step 2: Remove all lids, rings, and elastics from your preserving jars or bottles

Place the accessories of your jars (preserving rings, elastic bands, clamps, etc.) in a cooking pot and bring to the boil for 10 minutes.

Step 3: Clean and sterilize your jars and bottles

Cleaning your jars and bottles

Cleaning means that you clean everything and that there are no solid particles in the form of food remains, syrup, soil, ... hanging on the pots . You do this in warm water with a detergent, rinse well.

Weck jars do not need to be sterilized. They do need to be clean and free of grease. Make sure your weck jars come out of the dishwasher clean, if necessary you can add a tablespoon of soda. If you do not have a dishwasher, wash the jars as hot as possible in water with soda (no detergent). Then rinse well again with hot water.

But cleaning does not mean sterilizing

To sterilize is to kill all forms of life. Microorganisms such as fungi, bacteria, spores, ...

Here are a few methods:

  • You can sterilize your jars and bottles in a large cooking pot with boiling water. After 10 minutes your jars will be sterile
  • You can also place them upside down in an oven with a temperature of 160-180 °C immediately after cleaning and rinsing. This for 15 minutes.
  • Place your washed and rinsed pots immediately in the microwave oven (BE) or microwave (NL) for 1 minute. And this on the highest setting.

3 birds with one stone: lids and accessories, jars and bottles clean and sterile in 1 movement

You can also kill 3 birds with one stone and clean and sterilize a huge amount of jars and bottles with all accessories in 1 movement. If you have a good dishwasher, you can fill it up (possibly the night before) and run it on the hottest program. Often there is also a steam function on it so that your jars are in top shape to store the vegetables. Steps 2 and 3 are done in my dishwasher.

With this machine it goes automatically. The timer starts when the desired temperature is reached.

Step 4: Preheat your preserving kettle

In the meantime, of course, heat your preserving kettle to the desired temperature. This is a fully automatic preserving kettle in stainless steel. I myself did it recently in a preserving kettle that was at least 50 years old on a gas stove with a preserving thermometer . I am looking forward to using the above. After my busy job, I want to make it as easy as possible for myself.

Here are some guidelines for canning temperatures for different vegetables. But usually your recipe will also specify what temperatures and canning times to use:

Vegetable and fruit canning temperatures and times:

Making vegetables Canning time Canning temperature
potatoes 90 min 100°C
Asparagus 120 min 100°C
Pickles 30 min 85°C
cauliflower 90 min 100°C
kale , palm cabbage andsavoy cabbage (leaf cabbage) 120 min 100°C
beans (princess, slicing, green beans, butter, ...) 120 min 100°C
broccoli 120 min 100°C
Mushrooms 90 min 100°C
Zucchini 120 min 100°C
peas (pods and pods ) 120 min 100°C
pumpkin 120 min 100°C
(Cabbage) turnip 120 min 100°C
Beetroot 45 min 100° C
red cabbage and white cabbage (head cabbages) 120 min 100°C
Celery) 120 min 100°C
Soup with vegetables 90 min 100°C
Soup with vegetables and meat 120 min 100°C
Brussels sprouts 90 min 100°C
Tomatoes (pulp) 30 min 100°C
carrots 120 min 100°C
Preserving fruit
Canning time Temperature
Currant - red currant 25 min 90°C
Strawberries 25 min 80°C
Apple - hard 40 min 85°C
Applesauce 30 min 85°C
Apricot - Peach 30 min 85°C
Blueberry - blueberry 25 min 85°C
Blackberries 25 min. 80°C
Raspberries 30 min 80°C
Jam and preserves Add 50% sugar boil and cool
Gooseberry / gooseberry 30 min 80°C
Mirabelle plums - pineapple cherry 30 min 85°C
Cherries 30 min 90°C
Quinces 30 min 95°C
Pears - soft ripe 30 min 90°C
Pears - hard 80 min 90°C
Plums 30 min 90°C
Rhubarb 30 min 100°C
Preserving meat (all types) 120 min 100°C
Preserving fish (all types) 120 min 100°C

Step 5: Making your preparation

While the water in your canner is heating, you can make your preparation. The preparation can be simple or just a very complex pasta sauce with red wine, artichokes, tomatoes, zucchini and garlic.

If you simply want to store your vegetables or fruit neutrally, you can simply place them in water.

IMPORTANT: The temperature of the water you add must be the same as your preserving water. Otherwise the sterilization system will not work. When filling the jars , the lid and the rim of the jar must be clean. For products with fat in them, fill up to 2 cm below the rim of the preserving jar, for other foods 1 cm is sufficient.

Preserving peaches
Use a glass tong to gently lower your prepared jars

You can add sugar, vinegar and aromatics (often herbs) to that water. Cut your vegetables cleverly so that you get as many vegetables as possible in your preserving jar. You can also combine them cleverly. A layer of peas alternated with carrot sticks, then peas again, etc. The peas work their way between the carrots and so you get more in your jar. Add the hot water between the layers and shake lightly, so that your vegetables arrange themselves even better and you get more vegetables in a jar or bottle .

Of course, you can also preserve preparations such as a Provencal sauce or fruit puree for your baby. A funnel with a large mouth helps with this. Here too, preserve your preparation at a temperature that hardly deviates from your preserving temperature.

Step 6: Preserving the canning jars or jars in the water

In the meantime, the water in your preserving kettle will undoubtedly have reached the right temperature and you can lower the jars. Use special jar tongs to do this so that you don't burn your hands. Take a book with you or start preparing the next series of preparations or jars . Enjoy the moment when you are securing your food for the winter.

When the canning time is up, you can remove the jars from your canner with the jar tongs and place them on a towel. During cooling, the remaining air is sucked out of the jars and bottles. The 'magic' happens silently with jars with elastic bands. I love the 'plop' with canners with lids. You often get a fright, but it does have its charm.

After about 12 hours you can take your pots to your personal treasure room. Ali Baba's palace, Pandora's box, ... call it what you want.

September 4, 2021: My daughter Ella very proud with a tub of 30 liters of vegetables. It resulted in 6 juice bottles of 1 liter of vegetable sauce and 5 liters of soup

Important tip: If you put the jars or bottles away, do this preferably in a dark place. Your treasure room looks very nice with all those filled jars , but the content can discolour under the influence of light. The taste is not affected, but the eye also wants something.

Finally, about preserving vegetables

The vegetable garden is good for body, mind, the environment, your social contacts, the taste in your plate and you also save a pretty penny with it. Especially if you can preserve your surpluses until autumn, winter and early spring. This year I ate asparagus in May and June until I really couldn't eat any more. After that I gave away loads of them. From now on I'm going to preserve asparagus. Open a 1 liter jar with 15 home-grown asparagus on November 13 and eat it with boiled Charlotte potatoes, a mashed egg, parsley and a butter sauce, ... you'll feel like you're back in spring.

She is even more proud after preserving 6 liters of tomatoes, eggplant and peppers

1 comment

Ik was opzoek naar een recept voor het maken van een broccoli chutney en kwam op jouw website. Ik heb eveneens een moestuin en weck ook geregeld in. Nu las ik dat je asperges zelf inmaak. Dit heb ik een aantal jaren geprobeerd en het inwecken lukte. De asperges werd in zoutwater geblancheerd, voorzichtig ingelegd en de juiste tijd ingeweckd. Alles zag er mooi uit, goed gesloten etc. Echter ALTIJD na 2 dagen begint er binnen in bellen te vormen en de vacuum wordt dan verbroken. Ik heb, tot op heden, niet kunnen achterhalen wat dit veroorzaakte en hoe dit probleem op te lossen. Kun jij mij misschien vertellen wat er aan de hand is. Ik had dit jaar geen moed gevonden om eraan te beginnen. Heel spijtig. Met vruchtbare groet, Cillie

Cillie,

Leave a comment