

Table of contents:
Introduction to making white wine or rosé
Hello! I'm glad you're consulting this article, which should help you step-by-step to make delicious white wine or rosé. Rosé is actually made like white wine. That is why I cover making white wine and making rosé in the same article.
I will divide this article about making white wine into 10 steps. From harvest (1) to bottling (10). I can't wait to help you on your way in your winemaking adventure.
In an earlier general article about winemaking, I provide very important general tips. I highly recommend that if you haven't already, you read the article below first.

In the article you are reading here, I will explain everything I know about making white wine and rosé. And I guarantee you, we are aiming for top quality. There is no reason why hobby wine should taste less good than wine made by (semi-) professional winemakers.
I do think it is important that you take your hobby and passion seriously and invest in good equipment. That does not always mean it has to be expensive, but we are not, for example, going to save on hygiene, measuring equipment, and ease of use. For example, we aren't going to destem 100 kilos of grapes with a fork. Nobody is happy with that, including your (oxidizing) must.
What you need to make white wine by phase
To make it easy for you, I have created the list below for each step of the vinification. You can use it as your checklist. Occasionally I will include some information on why you need this. Don't worry, later in this monster article I will explain in detail which choices you make and how to use the equipment.
Step 1: Cleaning your equipment and general matters
- To clean: A neutral soap to make everything that comes into contact with your grapes, must, juice, or wine clean; I also often use the dishwasher on the hottest program. Caked-on parts can be soaked off with Puro oxi. That is sodium percarbonate, an eco-friendly product that (just like hydrogen peroxide) releases solids upon contact on a smooth surface. It also works for stain removal, odors, and degreasing well. I never have Puro oxi far away to clean a demijohn, soak the taps of my tanks, or soak my measuring cups, hydrometer, etc. after use. Always clean after use and keep everything dust-free. This way you can quickly get started with the next harvest after a short rinse and sanitization.
- Sanitizers to sanitize everything that comes into contact with your grapes, must, juice, or wine:
- Potassium metabisulfite and citric acid. 1 gram of potassium metabisulfite and 0.5 grams of citric acid per liter of water is a strong sanitizer. The sulfur smell is not for everyone; I also use Alcodes more.
- Alcodes alcohol solution sprayer for the hard-to-reach corners and edges (wine press, crusher-destemmer, floating lids, taps, etc.). This solution kills bacteria and fungi and evaporates upon drying. So you don't have to rinse afterward, where you could risk contaminating your equipment again.
- A good vinification schedule to guide you step-by-step.
- Writing utensils
- Teaspoon
- A measuring cup for on a precision scale to weigh potassium metabisulfite and citric acid.
I am making a shopping list for you for each step:
Phase 2: Harvesting your grapes
- A good harvesting shear with blunt tips and small shears (not the same as pruning shears)
- Harvest crates (stackable and nestable) with a convenient trolley and lid.
- A 0-50 kg scale
- A freezer or refrigerator with an external thermostat (optional)
Phase 3 winemaking: Destemming and crushing
- A crusher-destemmer to, of course, destem and crush your grapes. You can then press the crushed grapes immediately or let them macerate for skin extraction. Grapes for red wine or orange wine can ferment immediately. (more info later in this article).
- Potassium metabisulfite for antibacterial purposes and to prevent oxidation of the must.
- A precision scale
- Stainless steel bucket with lid or plastic bucket with lid to temporarily collect your crushed and destemmed grapes
- An open vat for (optional) must treatment: fermentation bucket or stainless steel tank
Phase 4: Must treatment:
- A 10 ml graduated pipette or 25 ml graduated pipette to measure your pecto-enzymes.
- Pecto-enzymes for juice yield
- If you are considering cold maceration (red wine, orange wine, and full-bodied white), a temperature control or thermostat for a chest freezer is super handy.
Phase 5: Pressing the must into juice
- A hydro-press or a manual press
- A pH meter (optional); invest in a good, reliable pH meter
- A must scoop or 1-liter measuring jug for scooping
- Reception vessel or pre-clarification vessel
- Potassium metabisulphite
- A precision scale
Phase 6: Pre-clarification of the juice
- A freezer or refrigerator with an external thermostat (optional)
You will notice that this product appears often. This thermostat can switch on a device to cool (freezer), but also to heat (a heater). So you can use this high-quality thermostat for cold maceration or pre-clarification, as well as for malo (if your room is not at 20°C).
Phase 7: Racking juice to fermentation vessel
Phase 8: Measuring your juice and adjusting if necessary
- Wine thief to fill a 250 ml graduated cylinder
- A 10 ml volumetric pipette to fill an acidometer
- An Acidometer with blue lye and iodine solution
- 3 ml dropper pipettes for dropping
- A pH meter
- Funnel with fine sieve
- A wine thermometer
- A density meter or hydrometer
- Measuring tube or cylinder of 250 ml
- Refractometer
- Deacidifying: Precipitating chalk (optional)
- Acidifying: Tartaric acid (optional)
Phase 9: Starting the fermentation
- Measuring cups 100, 250 ml or 1 liter
- For yeast starter (size = volume of juice divided by 100, e.g.: 20 liters of wine, measuring cup +/- 200 ml)
- For yeast nutrients (size = same as for yeast starter)
- A wine thermometer
- Water at 30-35 degrees
- Wine yeast
- Yeast activator for yeast starter Vitadrive F3
- Yeast nutrients Vitaferm F3
- Cane sugar (optional, to adjust potential alcohol)
- Tea towel or dishcloth
- A freezer or refrigerator with an external thermostat (optional)
Phase 10: Racking and initiating or avoiding malolactic fermentation
- Potassium metabisulphite
- A siphon or pump
- Precision scale
- Bacticare Lysozyme to avoid malolactic fermentation
- Malo bacteria if malolactic fermentation is desired
Phase 11: Wine aging and cold stabilization
- A siphon or pump
- Precision scale
- Potassium metabisulphite
- Freezer with external thermostat, cooling cell, or refrigerator
- Bentonite
Phase 12: Bottling
- Puro Oxi for dirty bottles
- Clean water
- Bottle brush
- Bottle rinser
- Potassium metabisulphite and citric acid
- Bottles
- An anti-foaming filling pipe
- A draining rack
- A siphon with butterfly valve or an Enolmatic filling machine with Tandem filter housing
- Corks
- A corker
- Capsules
- A shrinking machine
- Labels
Now that I have listed everything you need, I can start the story about winemaking. I will try to explain everything in plain language. I am not a biochemist, nor do I want to be one. I will keep it simple so that it is possible for you to make your dream wine.
You will read, re-read, and read this article again. That is why I divided it into 10 steps that you need to master. The result of your wine is the product of all your efforts. If you mess up once, it is often game over. Some things can be corrected, others will feed your kitchen sink.
Let's get started...
Step 1: All equipment ready, cleaning and sanitizing - before the harvest
As your harvest date approaches, it is best to ensure that all your equipment is clean and sanitized. From pruning shears to airlocks, I personally leave nothing to chance. I also always rinse everything after use before putting it away for the next time. Residues of skins, juice, or seeds can cause dirt on your equipment, and naturally, we want to work as cleanly as possible. Must residues are also so sticky that they get stuck absolutely everywhere. Cleaning well after every action is therefore very important.
There is a difference between cleaning and sanitizing. By cleaning, I mean that there is no dust, dirt, or residues from previous actions present. You can wash things with soap. Definitely do not use perfumed or highly concentrated products here. A neutral hand soap is ideal. Dish soap is usually quite aggressive; you do not want a soap smell in your wine. It is also best to leave the soaps with essential oils that smell like a hammam that you received for Christmas alone.

Clean and sanitize everything that comes into contact with your must, juice, or wine.
But clean is not sterile, so we must sanitize. Sanitizing means that all unwanted organisms are gone from your wine equipment. You must sanitize your cleaned equipment again. I will give you two options to do that.
- You can make a solution of water, potassium metabisulfite, and citric acid. 1 gram of potassium metabisulfite and 0.5 grams of citric acid per liter of water.
- You can use Alcodes. An alcohol solution that has a strong sanitizing effect.
The solution of potassium metabisulfite (or KDS) and citric acid is relatively inexpensive and therefore interesting for large volumes. For example, I rinse my used wooden barrels with that solution. For the rest, I avoid this solution because I find sulfur unpleasant to the nose, and the solution also poses a danger upon contact with must, juice, or wine. Due to the concentration, it can...
I spray large items such as a destemmer-crusher or a stainless steel fermentation tank after cleaning with a spray bottle containing a 2% solution of hydrogen peroxide in water. The more the tool or material comes into contact with your grapes, must, or wine, the better everything needs to be sanitized. The harvest crates in which I harvest are sprayed clean with a hard water jet and are not sanitized. My pipette, for example, which I use in my juice for measurements, I clean and sanitize very well. Go through the list at the beginning of this article the day or week before you start, and clean and sanitize everything you need in advance.
Step 1 : Harvesting your wine grapes
The most important part of the harvest : The maturity index
In the graph below, you can see the progression of sugars (red line) versus acids (green) in the vineyard after flowering. You can also see the aromas that reach a certain peak, which will heavily influence the harvest period. At the end of the graph, both acids and sugars rise together due to dehydration and the resulting evaporation of moisture from the grapes. This graph is crucial for understanding the maturity index.

Experienced winemakers might chuckle to themselves because they have dozens of harvests under their belts and can therefore harvest based on the feel and taste of the grape. However, for myself, and certainly for beginning winemakers, I place great importance on the maturity index of the ripening grapes in the vineyard. The maturity index is a ratio between:
- the sugars in the grape, which increase as the vintage progresses
- the acids in the grape, which decrease as the harvest date progresses
The maturity index therefore rises throughout the year. The ripeness of your grapes will determine the wine style you are going to create. In an ideal world, you would always wait until the desired maturity index for your harvest. But the condition of your grapes due to sunburn, birds, the Asian fruit fly drosophila suzukii, or fungi such as (downy) mildew or botrytis may force you to harvest earlier, leading you to make sparkling wine instead of an aromatic white wine. More on this shortly.
How to calculate the maturity index
A note beforehand: measure a selection of representative grapes from your vineyard or the section of the vineyard you wish to measure. This means taking grapes from the west side as well as the east side. From the bottom of the bunches as well as from the top. From the inside of the bunches as well as from the outside. This is how you achieve a realistic result.
As previously mentioned, you divide the sugars by the acids. The values we use for this are number of grams of sugar per liter and number of grams of acid per liter in sulfuric acid equivalent.
Most winemakers measure the sugar levels of their grapes in Oechsle or Brix. To convert these to the number of grams of sugar per liter, use the following formulas:
- (Oechsle x 2.5) - 13
- Brix x 10
So, grapes with 85 Oechsle contain 199.5 grams of sugar per liter and consequently have 19.95 °Brix.
To determine the acidity in sulfuric acid equivalent, you first measure the total acidity in tartaric acid equivalent. This is a titration test using blue lye in an acidometer. In the right-hand column, you can read the number of acids per liter in tartaric acid equivalent at the color change. You divide that figure by 1.53 to find the number of grams of acid per liter in sulfuric acid equivalent.
Which style requires which maturity index?
The maturity index is not an exact science. Every grape has properties that mean the maturity index should be taken with a grain of salt. However, it is a good guideline for your decisions in the vineyard or winery. The desired maturity index per wine style is as follows:
- Sparkling wine Champagne style: 15 - 20
- Sparkling wine fruity style: 20 - 25
- Crisp white wine: 30 - 35
- Full-bodied white wine: 35 - 45
- Fresh red wine: 35 - 40
- Full-bodied red wine: 40+
- Sweet white wine: 55+
Some examples of maturity index
Before we go to the examples, one more thing. It is not as if we measure grapes in our vineyard and then decide which wine style we are going to make. As a hobby winemaker, that might be possible, but even then. I determine the style I am aiming for with certain grapes long before they are ripe. Only when circumstances make the desired ripeness impossible do I adjust my wine style. If you want to make sparkling wine, make sure your grapes do not get too ripe. Ripe grapes do not provide the finesse we are looking for in sparkling wine. Conversely, leave healthy grapes on the plant for as long as possible.
Example 1: I want to make sparkling wine.
My Chardonnay and Pinot Meunier grapes have 70 Oechsle and 11 grams of tartaric acid.
70 Oechsle gives 162 grams of sugar per liter. 11 grams of tartaric acid per liter is 7.19 grams of acid per liter in sulfuric acid equivalent.
The maturity index is therefore (do the math): 22.53.
Conclusion: Our grapes are already a bit overripe to make sparkling wine in the Champagne style. This method involves harvesting grapes earlier and only gaining complexity during a long maturation period during the second fermentation 'sur lattes' (18 to 60 months).
A sparkling wine in a fruity style, also called the Low Countries style, will be harvested riper to have more fruit in the sparkling wine. This latter style will also be aged 'sur lattes' for less time (9 to 12 months). Instead of the traditional method with refermentation in the bottle with aging 'sur lattes', with these slightly riper grapes, a 'méthode ancestrale' is often chosen, also called Petnat. In this method, the wine is bottled just before the end (at a density of +/- 1004) of the first fermentation of the base wine. I might write a separate article about sparkling wine; that will follow later.
Example 2: I want to make a full-bodied white wine
I have Chardonnay vines with which I want to make a complex, wood-aged wine. I want to perform a malolactic fermentation and raise the wine 'sur lies' and age it in concrete to produce a complex, full-bodied white wine. It is truly a fantastic summer for viticulture, like that of 2025, and the sugar levels are shooting towards 93° Oechsle or 22 °Brix or 220 grams of sugar per liter. The tartaric acid has been nicely reduced to 7 grams of acid or 4.57 grams in sulfuric acid equivalent.
The maturity index is therefore: 48.14
Conclusion: What a year and what a harvest. Unprecedented. My grapes are very ripe and the intended style is certainly possible. An important point of attention is that I must definitely measure my pH after fermentation. Low acidity means that I will have to be extra vigilant regarding oxidation. Later, I will tell you more about sulfur management. What also strikes me is that the potential alcohol level of 220 grams of sugar is 13.07% alc. vol. The yeasts will soon need 16.83 grams of sugar to produce 1% alc. vol. That is still OK for full-bodied white wine, but personally, I prefer not to go higher for white wine.
I want to expand this example with a situation where the weather was much less favorable (like 2021) and my Chardonnay grapes showed signs of botrytis and had to be harvested at 78 Oechsle or 182 grams of sugar per liter and 9 grams of acid per liter in tartaric acid equivalent or 5.88 grams of acid per liter in sulfuric acid equivalent.
Maturity index: 30.95. Potential alc. vol.: 10.81%. This will not be a complex white wine, but it can yield a nice, fresh white wine that we can still chaptalize (add sugar) during fermentation to 11.5% alc. vol.
The most important question/conclusion of the maturity index
I will say it immediately, which is the most important thing for me for the continuation of the vinification: Is there anything in the skin of the grapes that I want in my wine?
The riper the grape, the more interesting the skin becomes. What are the most important things found in the skin of ripe grapes:
- Flavor precursors (the stone fruit in Souvignier gris)
- Polyphenols (for mouthfeel or bitterness in the wine)
- Anthocyanins (red) or flavonols (yellow) for the color of your wine
- Gums for a round mouthfeel
- Pectins: Less interesting, but they largely fall out during vinification
In unripe grapes, those skin components are less developed. The aromas are green, the polyphenols are very bitter, and the color is not present.
But by applying the maturity index in your choice of wine style, you will not encounter any surprises. In a sparkling wine or a fresh white style, we opt for less to no skin extraction, but rather for elegance and freshness.
The wine style, and therefore also skin extraction, will largely determine our choices during the subsequent phases of winemaking. Let's look ahead for a moment:
- Destemming/crushing or pressing whole bunches. For sparkling and fresh white wines, whole bunches are often pressed because there is then less skin contact. For red wine and full-bodied white wine, destemming and crushing are usually done because there is something in the skin that we want.
- Pressing pressure during pressing: very low for sparkling and white wine. 0.5 to 1 bar is a maximum. For full-bodied white wine, we go up to 1.5 bar.
- No to a very short cold maceration for sparkling wine, fresh white, or rosé. Long skin contact with red grapes causes your rosé to quickly become too red. The skin contact for full-bodied white can last a few days because extraction from the skin is desired.
- Pre-clarification is very important for sparkling, fresh white, and rosé. We only want juice and no skin components. With full-bodied white wine, pre-clarification is also present but less important.
- Low fermentation temperature to avoid skin components. A cold fermentation also promotes the freshness of your wine.
A good winemaker will, consciously or unconsciously, be concerned with the maturity index and the skin extraction that follows.
Harvesting grapes and rain
Preferably, harvest your grapes at least 24 hours after the last rainfall. When it rains, grapes soak up water. I once did the test and took a measurement of my Johanitter grapes before a rain shower at 61 Oechsle or 7.8 degrees of alcohol. After a night full of rain showers, I took measurements again, and my refractometer measured 7 Oechsle less, meaning 0.7 degrees of potential alcohol gone. After two beautiful sunny days, I was able to measure 63 Oechsle. You see that rain can make a difference. Sometimes a rainy period in September/October is hopeless, the fungal pressure is high, and you are faced with difficult choices. But if at all possible, wait 24 hours after the last rainfall; 48 hours is even better.
Cool grapes: fruitier aromas are preserved and better control
Cold fruit will give us more control during the winemaking process. In the morning in September or October, the grapes have a temperature around 6-15 degrees, naturally depending on the nighttime temperatures. That is a better temperature than grapes that have been hanging in the sun all morning and are, for example, 22°C. At warmer temperatures, your fruit oxidizes faster, and acids and fruity aromas escape. Especially with early varieties such as Siegerrebe and Solaris, which we sometimes harvest as early as August, we have to be on time.
Cold grapes are also more interesting in terms of the pre-clarification that follows after pressing. Especially with sparkling wine, fresh white, and rosé. So, summon your helpers early to harvest at the crack of dawn. In warm climates such as in Chile, Australia, or South Africa, harvesting is often done at night to have cool grapes.
Checking your harvest for bad berries, leaves, twigs, and insects
Both in the vineyard and later in your winery, it is best to ensure that you have beautiful bunches with as many intact berries as possible. It happens that certain bunches are affected by botrytis, bird damage, sunburn, etc. Wounded grapes hanging in your vineyard are quickly attacked by acetic acid bacteria. And if those bacteria end up in your must or wine, they have the annoying property of converting ethanol (alcohol) into acetic acid and ethyl acetate. And those two are anything but desired in your wine. A small amount of affected grapes can still be neutralized by an addition of sulfur after the harvest. But you cannot get away with too many affected grapes as a winemaker.
Therefore, it is best to remove the affected grapes or the parts of the bunch where there is damage. The healthier the fruit, the fewer problems you will have during winemaking. As a winemaker, we have to cut away the bad grapes (botrytis, downy mildew, powdery mildew, Drosophila suzukii, wasp damage, sunburn, etc.). Be sure to take your time. Try to select only flawless fruit. Especially if you want to make wine as naturally as possible. After a thorough check in the vineyard, it is best to also take a look in your winery to ensure no leaves or twigs have come along. We don't want those in our wine. The dense bunches, like those of my Johanitter, for example, are also home to many ladybugs and earwigs. During crushing and destemming, I always have a glass jar on hand with some twigs in it to save the ladybugs and earwigs from the wine press.

Harvest of my third-year Regent vines for rosé (2021) - intact grapes
Give clear instructions to your helpers
If you have called in help to harvest your grapes, give your pickers clear instructions about the picking process. Tell them about the selection you want and show them examples of what you do and do not want in your harvest bins. If you have vines that do not need to be harvested yet, inform your pickers. You cannot hang back clusters once they have been snipped :) Also, provide them with good, sanitized, and cleaned tools. Provide food and drinks, ensure a nice atmosphere, but keep an eye on things to make sure everyone stays focused on the work.
Pruning shears are not harvesting shears
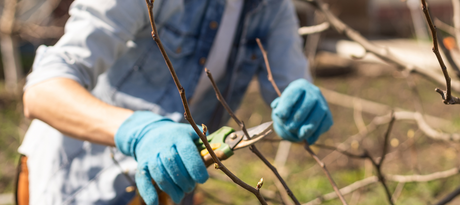
Everyone has a pair in their shed. A proud Swiss Felco 2 or Japanese hand-forged Okatsune pruning shears. These are very handy for the gentle pruning of your vineyard in winter, but they are not harvesting shears. Bypass shears are a weapon that can unnecessarily damage your grape clusters. When open, you essentially enter the cluster zone with two blades. Blades that will inevitably damage berries, release juice into your harvest bins, attract wasps, and the juice becomes sticky—in the worst case, things will start to ferment here and there. Therefore, choose harvesting shears with a small jaw and rounded blades. My favorite is the Okatsune 301, which you can see and purchase below.
Harvest in low, stackable, and clean crates
In principle, you can also put your clusters in a plastic bag or bucket after harvesting. Personally, I am a big fan of Veenman crates or, even better, nestable harvest crates specially designed for the harvest. In the low crates, you can place about 10 kilos of grapes. When stacking the crates, the grapes are not bruised. If you have to drive to your winery, the stacked crates will stay neatly in place. You can also quickly weigh them on a scale; one Veenman crate, for example, weighs 835 grams. This makes it easy to determine your net harvest weight.
Storing grapes in the refrigerator
As hobby winemakers, we often have children, work, other hobbies, etc., that need our attention. This means we cannot always harvest in the morning to have the right temperature. Or we can harvest in the morning, but we cannot crush and destem immediately. Once your grapes are harvested, you can easily store them for a day or two in the refrigerator at 4-6°C without them losing their potential. I use an old chest freezer myself. I work with an external thermostat placed between the freezer plug and the wall outlet. An external probe is attached to the thermostat, which I place inside the freezer. It ensures the freezer only runs when the temperature rises above a set value (for example, 8 degrees). The thermostat also cuts power to the freezer when the temperature drops below a certain value (for example, 6 degrees). This way, I can always determine the temperature myself. I can cool up to 120 kilos of grapes in my freezer. A cold room is also very useful.
Weighing your harvested wine grapes or even counting clusters
Some winemakers go much further before weighing the harvest of wine grapes. They also count the number of clusters, per variety, and even per row. This allows them to map out the yield per grape variety or per row of grapes. This gives them insight into the productivity of the vineyard over the years. I don't go that far.

making wine - know your harvested clusters. Then you can also calculate the juice yield This display of my scale shows 9.070 kg, I still have to subtract 830 grams for the Veenman crate. You can, of course, reset the scale to 0.000 with an empty Veenman crate on it. I didn't have any empty ones left, everything was full :)
I weigh my grapes as soon as they arrive at my urban winery, also known as my shed. I measure the weight per variety or, if necessary, per wine if I am combining multiple grapes at the start of the winemaking process. I find the weight useful for comparing with the must (the crushed and destemmed grapes). Years with a lot of poor fruit set will give a lower ratio of weight of clusters / must because the stems then weigh relatively more than the berries. In 2020, for example, I had 32 kilos of Johanniter grapes from 17 vines. I got 26.5 liters of must from them. This data can be interesting to compare with the 2021 harvest.
Weighing your grapes can also be useful for knowing the juice yield after pressing.
Step 2 : Crushing and destemming your clusters (as quickly as possible after harvest 10-20°C)
Whether making white wine, rosé, or red wine, we destem and crush the berries. There are a few exceptions that require a separate article. In this article, for convenience, we will destem and crush. Exceptions are:
- Carbonic maceration
- Whole-cluster pressing, often used for sparkling wine.
The easiest way is a crusher-destemmer that removes the berries from the stalks and crushes the grapes. If you have few vines and have the heart to remove all the berries by hand or with a fork, you can do that too. But if you have 10 vines (that's easily 160 clusters) or more, definitely consider investing in a crusher-destemmer. Believe me, your desire to make wine will quickly vanish if you spend a few hours struggling to destem and crush your grapes. And if you can afford it, choose a stainless steel destemmer-crusher. A lacquered one will always show some rust at damage points or along the seams.
Destemming and, especially, crushing your grapes also ensures that pressing goes more smoothly. An individual berry can be very resilient, let alone many intact berries together. So, crushing is very useful.
My struggle in 2018 and 2019
In my first year, 2018, I worked with a hard sieve that I could place on a bucket. I had 20 kilos of grapes and spent the evening pushing them through the grate by hand; that was crushing, destemming, and pressing all at once. It was pitch dark when I finished and my hands were bright red (from the friction, not from the grapes, because those were white Johanniter grapes) and were very painful. The year that followed, in 2019, I inherited an electric motor-driven crusher from Joseph with two rotating cylinders with a rough surface. Those cylinders were 0.5 cm apart and I could throw my clusters through them. But then I had a bucket full of must, still including the stems, which had quite a few berries still attached. It was a huge hassle again to pick out those stems and shake off the last few grapes. In 2020, I invested in a crusher-destemmer with a slide, and I must say: "A world of difference." It doesn't have a motor but is very easy to operate. The stems come out the side of the machine, the must comes out the bottom.
A video:
Add potassium metabisulfite to the receiving vessel of your must
To neutralize all wild yeasts and bacteria present in the must, we add a small dose of potassium metabisulfite to the must treatment vessel where the crushed grapes will go. We do this before we start crushing. You can assume that you will have 90% must by weight of your grapes. 100 liters of wine yields 90 liters of must. Practical: add 0.5 grams of potassium metabisulfite = KDS per 10 liters of must in the receiving vessel. Note, ultimately this is only about 2/3 or +/- 0.30 grams per 10 liters of sulfite or 30 mg of sulfite per liter, given that potassium molecules are also present in potassium metabisulfite. I always state the quantities in grams of potassium metabisulfite or KDS per 10 liters; some sites state it differently. If you expect 90 liters of must, add 4.5 grams of potassium metabisulfite to your receiving vessel. Or distribute that amount if you have multiple smaller vessels.
Making white wine - Crushing and destemming
If your mass of grapes is too heavy to move after destemming and crushing, it is best to place a temporary bucket under your crusher-destemmer. Then you don't have to lug around vessels weighing tens of kilograms. I collect the crushed grapes in a 30-liter plastic fermentation bucket, which I regularly empty into a must treatment vessel. This is where the 0.5 grams per 10 liters of potassium metabisulfite is. Your wine is now temporarily protected; the sulfur will bind with the oxygen in the wine and thus prevent oxidation, and some wild yeasts and (acetic acid) bacteria will also be silenced.
Phase 3: Must treatment (optional)
Here you have to make a choice. Will I perform a must treatment or not? I will tell you shortly about the things that will determine your choices. The question is: "Am I going to do something with the destemmed and crushed grapes, or am I going straight to the next steps?" This is also the last step that is the same for white wine, red wine, and rosé. After this, the paths separate. White wine and rosé will be pressed after the (optional) must treatment; for red wine, fermentation will take place in contact with the skins. Now that your grapes are neatly separated from the stems and your berries are crushed, you have must. The skins and seeds are still with your juice, and now is the time to treat your must if you want to. Due to the sulfite from the previous step, your wine is now protected against oxidation. During the must treatment, it is best to put a (floating) lid on your receiving vessel to avoid flies and a constant supply of oxygen. What treatments are possible:
Add pecto-enzymes for cell breakdown and juice yield
What you can do half an hour after destemming/crushing and the addition of potassium metabisulfite (KDS) is to add pecto-enzyme for juice yield. Pecto-enzymes soften the cell walls of the fruit pulp and skins so that more juice can be pressed from the grapes. Be aware that this is accompanied by skin extraction. Think of unripe or damaged grapes, to which it is better not to add pecto-enzymes. There is fast-acting pecto-enzyme (Trenolin), which is useful if you only want 2 hours of skin contact. There is also standard Pecto Enzyme, which works best if left to act overnight.
Applying a cold maceration to your must - 4 reasons
After destemming and crushing, you can keep your must cold for 24 hours to 4 days; this is called cold maceration. A prerequisite for cold maceration is healthy fruit. If you have a poor harvest, it is best to skip this step. Along with the good things in the skin, there are too many bad components in your must if the harvest is poor or damaged. With nice fruit, the following can be a reason to certainly perform a cold maceration. Cold maceration takes place at 2 to 6 degrees Celsius. This prevents spontaneous yeasts and bacteria from getting to work on your must. As mentioned earlier in this article, you do not perform must treatment if there is nothing in the skin that you want.
First reason: Color extraction
A cold maceration extracts color from the skins of your wine. If you want to make a red wine or orange wine, it is logical to perform a cold maceration. Anthocyanins (red) and flavonols (yellow), which provide color in your wine, are more soluble in must at colder temperatures. Harsh tannins are extracted during alcoholic fermentation.

Destemmed and crushed grapes, you can give a cold maceration or treatment for juice yield
Second reason: Flavor and aroma components
Just like color, a cold maceration will also bring flavor and aroma into your wine without the harsh tannin. The flavor and aroma components from a cold maceration promote fruitiness and provide an extra touch of complexity to your wine.
Third reason: softer tannin
During a cold maceration, tannins are indeed extracted from the grape skins, but these are soft tannins like flavonols, catechins, and anthocyanins. With cold maceration, the harsh tannins like lignins or large polymer tannins that require ethanol (alcohol) to dissolve are not released into your must. The tannins from the seeds also will not be released during a cold maceration.
Fourth reason: extraction of yeast nutrition
A fourth reason to perform a cold maceration is the extraction of 'YAN' or Yeast Assimilable Nitrogen. Especially when you make natural wine and do not add additives to your must, this can be useful. In grapes from an organic or biodynamic vineyard, there is more nitrogen present. This is due to more active soil life, slower, more natural ripening, and less artificial stress. And with a cold maceration, you end up with enough YAN to carry out the spontaneous fermentation of a natural wine. Natural winemakers who have not mastered that often produce 'flawed wines'.
Cold maceration for extra nitrogen in a chemically protected vineyard is certainly insufficient. Extra yeast nutrition is necessary here. A lab test can definitely provide clarity.
Step 4: Pressing your must into juice
For white wine and rosé (in all styles), we press the must into juice before alcoholic fermentation. For red wine and orange wine, we ferment the must—also called pulp fermentation—and only then is it pressed. You might remember the terms ripeness index, wine style, and skin extraction from the previous chapters. These concepts are also super important in this phase of the vinification process.
Types of wine presses
Which press you use to turn your grape must into juice largely depends on your budget and the amount of grapes you have, among other things. In some regions, they use specific presses like the vertical presses from the Champagne region. Large and modern wineries have electronically controlled membrane presses with various pressing programs. The presses can rotate, increase press pressure, pause, ... depending on your wine style.
As a smaller winemaker, we press with a regular fruit press or, if you have a larger budget, with a hydro press. I personally press with the hydro press because I can read the press pressure on the side of the press. Regular fruit presses do not show press pressure. The pressing surface is also smaller with a fruit press where a pressure plate the diameter of the press is pushed down. With a hydro press, there is an elongated balloon on the central axis of the press that inflates. This ensures that the press area is much larger and you can press more delicately. A 35-liter hydro press is the smallest model and is worth it from a vineyard of 25 vines. They produce 1.5 to 4 kilos of grapes per plant, depending on the variety and your choices. If you want less ripe fruit, you can leave more bunches hanging. If you want concentration for full-bodied white wine, orange wine, or red wine, you can trim away bunches after flowering (vendange verte or green harvest).
In presses, both fruit press and hydro press, you can process 2x the volume of the press in one pressing session. This depends on the grape variety (PIWIs yield less free-run juice) and also on the must treatment (pectin enzymes or cold maceration yield more free-run juice). In my 35-kilo hydro press, I can press an average of about 70 kilos of grapes. As mentioned earlier, after destemming and crushing, you immediately have about half your volume in free-run juice that flows directly from the press.
In a hydro press, you can also press whole bunches, but then you must ensure that the stem of your bunches is not too woody. That could damage the balloon of your press. Also, press gradually. Start at 0.2 bar and build up towards 0.8. A whole-bunch pressing that you do for finesse and little extraction is best not pressed harder than 0.8. You also don't want to press your stems too hard because they contain unwanted tannins.
Perhaps another look at whole-cluster pressing
You already heard me talk about whole-cluster pressing in the previous paragraph and also when I said "is there something in the skin that I want," i.e., skin extraction. I will share a few more factors that are important to know:
- As I mentioned earlier, there is less skin breakage and extraction from the skin compared to destemmed and crushed grapes. Thus, less bitterness, oxidative phenols, and color. You have more flavor purity and high quality of juice.
- In addition, whole-cluster pressing also provides good juice drainage. The stems ensure an open structure, good drainage of the juice, and less compaction or clogging.
- A gentler pressing is also possible; less pressure is needed to extract juice.
However, there are a few important points of attention with whole-cluster pressing:
- The clusters and the grapes must be perfectly healthy. Rotten or affected grapes will contaminate your entire pressing. It is easier to make a selection when destemming and crushing.
- With overripe grapes, the skins break anyway, and the desired effect of whole-cluster pressing is essentially lost.
- As mentioned earlier, press gently. 0.8 bar is a maximum.
- Press in fractions. Separate the first juice, the free-run juice, from the juice from a gentle pressing of 0.2 bar. That is your "Cuvée" and the most delicate juice. When pressing harder, we refer to the "taille," which can then be blended into the same or a less delicate wine. The taille is also more suitable for making a yeast starter because it contains more matter.
- The press volume per pressing is also smaller than with destemmed and crushed grapes because you have hardly any free-run juice, so the clusters take up 100% of the volume of your press. Your press therefore needs to be larger.
A quick overview of wine styles that benefit from whole-cluster pressing:
- Sparkling wine
- Fresh white wines (Johanniter, Sauvitage, Auxerrois, ...)
- Light rosé or blanc de noirs
- Part of a cuvée for elegant red wine (pinot noir, gamay)
Pressing pressure per wine style
Press yield and press pressure are equivalent to skin extraction. This is why sparkling wines and delicate Burgundy wines are often pressed as whole clusters and/or at a low press pressure. An overview of press pressure per wine style:
- Base wine for sparkling wine: 0.2 to 0.8 bar
- Fresh white wine and rosé: 0.2 to 1 bar
- Full-bodied white wine: 0.4 to 1.2 bar
- Fresh fruity red wine: 1 to 1.5 bar
- Orange wine and red wine: 0.8 to 1.6 bar
Adding sulfur after pressing
Pressing is quite a drastic action for your grapes, where a lot of oxygen enters the wine, or worse, organisms or certain substances present on your grapes due to diseases or pests enter the pressed juice. To keep oxygen and any other "spoilers" under control, we add 0.5 grams of potassium metabisulfite (KDS) per 10 liters of juice. I add half of what I estimate in volume to the settling tank. I add the other 2.5 grams to the last buckets under my press. Often the press keeps running very slowly for a long time, and by spreading the KDS dosage in the last buckets, the juice in them will not oxidize. My last bucket might sit for two hours with, for example, 3 liters of juice. 0.5 grams of KDS in that bucket ensures that the last pressed juice does not oxidize and is protected.
By only putting half of the KDS in the settling tank, you also have a margin in case of lower press yield. I once pressed 50 kilos of Muscaris grapes with an expected press yield of 60%. I put 1.5 grams of KDS in my settling tank. It then turned out that the press yield was only 35% (Muscaris has a lot of fruit flesh, and I might have been better off using pectic enzymes). I then topped up the tank with juice from other white grapes because I wanted to work with a yeast that did not have much sulfur tolerance. More on yeasts later.
Step 5: Settling and measuring our juice for white wine or rosé wine
Our must became juice in the previous step. The pressed juice often still contains some things we do not want in the wine. Things from the grape itself, but also external things that can arise from diseases or pests. To get those useless or unwanted things out of the wine, we perform a settling process (débourbage).
The two things that will help us with settling are temperature and fining agents.
What things from the juice do we want to precipitate?
If we want to go to the next phase, alcoholic fermentation, it is important that our juice is pure and that some unwanted substances or substances we no longer need are precipitated.
Solid particles from the grape itself
What we no longer need in our juice are solid particles from the grapes themselves. Pieces of skin, seeds, and fruit flesh no longer have a function at this stage. It is therefore important to precipitate these particles during settling.
Oxidative enzymes
If your grapes were affected by Botrytis (gray mold or gray rot), the juice can contain unwanted oxidative enzymes, such as laccase. This enzyme can later cause browning and loss of wine quality. By allowing the juice to settle well, fungal particles and other solid components are removed, which also eliminates part of this unwanted enzyme activity.
Phenols and tannins
These are bitter compounds and pigments that mainly come from the skins and seeds. Hard pressing and unripe fruit can be the cause of this.
Phenols are oxidized by enzymes such as polyphenol oxidase and laccase and can give a bitter, astringent taste to your final wine. And this can also lead to premature oxidation of your juice, causing fruit aromas to break down.
A portion of the phenols and tannins precipitates spontaneously during settling, while another portion is removed later with fining agents.
Proteins
Must naturally contains grape proteins. These do not cause immediate problems, but can lead to protein haze in the bottle later on. A portion of these settle spontaneously during clarification, although bentonite is much more effective later. This will be covered later in the maturation process (step 8) when we discuss heat-unstable proteins.
Micro-organisms you would rather not have in your wine
When fruit is damaged in the vineyard (by birds, hail, Drosophila suzukii, or other misfortune), juice is released from the grapes. Lactic acid bacteria and, especially, acetic acid bacteria already present multiply rapidly on the grapes. Consequently, those unwanted micro-organisms end up in your juice.
Proper clarification helps to partially reduce this unwanted microflora before alcoholic fermentation begins. Sulfite additions after destemming, crushing, and pressing also partially inhibit these micro-organisms.
Clarification does not get rid of 100% of these substances; you are not sterilizing the must. However, by removing the sediment, you significantly lower their numbers.
Pectins and colloids
These are very fine substances that keep the must cloudy.
Not everything settles spontaneously, which is why pectic enzymes are sometimes added before clarification. These are the same enzymes added during must treatment to improve juice yield. So, if you have already used pectic enzymes in your must treatment before pressing, they are still present in your juice, unless you have heavily sulfited.
And what about wild yeasts?
For me personally, indigenous yeasts from the vineyard are a blessing. They can start a spontaneous fermentation that adds complexity to your wine.
However, if you want a highly controlled vinification using cultured yeasts, you can also settle out the wild yeasts during clarification. You do this by cold-stabilizing for longer and not carrying any lees over to the fermentation vessel. Be aware that you will also be removing little nutrient for your yeast, which you will then need to add during fermentation.

Tom Deseyn
The type of clarification you perform depends on the type of winemaker you are. If you want to work as naturally as possible, harvest only intact and ripe grapes that you press gently. You can simply clarify those by gravity at a cold temperature. Damaged fruit can also be vinified, but that requires some adjustment. I will provide an overview.
Some rules of thumb for clarification
1. Work as reductively (without oxygen) as possible
The goal of clarification is not just removing lees, but also protecting aromas and limiting oxidation.
Recommendations:
- Sulfite immediately after pressing.
- Avoid splashing during pumping.
- Fill the clarification tank as full as possible or use a floating lid that sits just above or on the wine.
- Keep the tank sealed.
- Limit the number of rackings before fermentation.
Extra important with Botrytis
- Laccase needs oxygen to oxidize phenols.
- Less oxygen = less oxidation.
2. Clarification temperature
- Healthy fruit: 8-12 °C
- Aromatic white wines: 5-10 °C
- Botrytis or damaged fruit: 5-8 °C
- Spontaneous fermentation desired: 8-12 °C
Too cold (< 5 °C):
- slower settling;
- pectic enzymes work less effectively;
- risk of the must "stalling."
Too warm (> 15 °C):
- more oxidation;
- more microbial activity;
- greater chance of spontaneous fermentation during clarification.
3. Duration of clarification
Healthy fruit: 12-24 hours
- High amount of lees: 24-36 hours
- Botrytis fruit: 24-48 hours
Longer is not always better:
- more risk of oxidation;
- more microbial activity;
- loss of freshness.
Clarification in 3 situations and auxiliary agents
Situation 1: Ideal scenario: healthy, ripe fruit that has been pressed gently (< 1.5 bar)
Add pectic enzyme to the receiving tank after pressing for faster clarification, breakdown of cell structures, and release of aromas, minerals, and nitrogen (yeast nutrient).
Standard clarification at cold temperature.
Rack off the coarse lees and take the fine lees along to the fermentation vessel.
Situation 2: With unripe fruit
Be cautious with pectic enzymes because they can increase extraction from skins and seeds. In unripe grapes, that material often contains more green tannins and vegetal phenols, which can lead to bitterness and a less elegant wine.
If the must already displays a bitter or vegetal character, a limited treatment with PVPP can be considered to remove some of the most reactive phenols. Bentonite is usually not necessary during the must phase unless there is also fungal infection or oxidation issues.
Use standard cold clarification to remove coarse lees. Take the fine lees along.
Situation 3: With diseased or damaged fruit
Avoid pectic enzyme in this situation: With damaged or Botrytis-affected fruit, you must be careful with over-extraction. Extra released phenols can serve as a substrate (breeding ground) for oxidative enzymes such as laccase, which increases the risk of browning and oxidation.
Add PVPP to bind oxidation-sensitive phenols and already oxidized compounds. Give it 1 to 2 hours of contact.
Then add bentonite to remove some of the proteins and enzymes such as laccase from the must. Bring the bentonite into contact with your juice gently by stirring lightly.
Perform a thorough cold clarification for 48 hours.
Rack off only the clear must and leave behind both the coarse and the majority of the fine lees.
Then start the alcoholic fermentation as quickly as possible so that unwanted micro-organisms have less chance to develop further.
How is clarification carried out practically?
- After pressing, pump or transfer the pressed juice to a clarification tank that must be full. We avoid oxygen contact in this phase. Ensure 0.5 grams of KDS (potassium metabisulfite) per 10 liters of juice. Dissolve it in lukewarm water or juice that you warm up in a 'bain-marie.' This helps the KDS dissolve better and makes it easier to distribute throughout your juice.
- As explained in a previous step, I divide the KDS into two additions. Directly into the receiving tank. And I add the rest with the final buckets coming out of my press. In the final phase of pressing, the juice drips more slowly and would discolor and oxidize faster if I had poured all the KDS into the clarification tank.
Add your pectic enzyme to the perfect fruit now if desired. If you already used pectic enzyme during the must treatment, halve the recommended dose during the pre-clearing.




4 comments
Dag Tom
Je blog is heel duidelijk maar ik heb dezelfde vraag als de 3 voorgangers, is de verdere info terug te vinden op de website of kan ik deze ergens anders vinden? Alvast bedankt voor een antwoord.
Johan
Beste,
Je blog is heel duidelijk maar ik heb dezelfde vraag als de 2 voorgangers, is de verdere info terug te vinden op de website of kan ik deze ergens anders vinden? Alvast bedankt voor een antwoord.
Hallo Tom,
Net zoals de vorige lezer vind ik je blog geweldig. Zeer gestructureerde en hulpvaardige uitleg, die ik kan gebruiken bij het voortzetten van de hobby van mijn vader (we namen afscheid van hem begin dit jaar). Ik heb namelijk dezelfde vraag als de vorige lezer : ’ Wat betreft het artikel “Hoe maak je je eigen witte of rosé wijn – stap voor stap”, het stopt bij stap 4 en ik kan de uitleg van de volgende stappen niet vinden. Is dit normaal of heb ik niet goed gezocht?’ Alvast bedankt!
Hallo Tom,
Ik vind je blog over wijn geweldig. Samen met vijf vrienden bezitten we een kleine wijngaard met 600 wijnstokken in Henegouwen en we willen dit jaar voor het eerst wijn produceren. Dat is spannend, maar er komt ook veel bij kijken, zoals de apparatuur en het wijnbereidingsproces. Het is waar dat het voor amateurwijnmakers zoals wij niet eenvoudig is om de juiste informatie op internet te vinden. Uw blog is perfect voor ons en zal ons zeker helpen. Wat betreft het artikel “Hoe maak je je eigen witte of rosé wijn – stap voor stap”, het stopt bij stap 4 en ik kan de uitleg van de volgende stappen niet vinden. Is dit normaal of heb ik niet goed gezocht? Bedankt voor uw antwoord en veel succes.